How to color grade headshots? (Quick and Easy Steps)

Color grading is a process used to improve the overall appearance of an image. It involves adjusting curves, saturation, solid color fill, levels, and contrast to create a visually appealing look. Creating a specific look for a headshot is particularly important, takes time, and needs practice to be perfect, and for that, you need a skilled photographer who can do the job for you. If you want to create visually appealing headshots, your photographer must have amazing skills to capture the uniqueness of the subject.
The right photo editing and color grading will play a perfect role in enhancing the headshots. In this blog, we will discover why color grading is important and how it brings life to the images. We will also introduce you to the magic online tool that will enable you to create images that give a stunning and professional look to your headshot. So let's first understand what exactly color grading is.
What is Color Grading?
Color grading is the process of modifying and intensifying the color properties of a video or image. It implies controlling elements like brightness, contrast, saturation, and hue to attain a desired aesthetic or mood. This tool is often used in film, television, and photography to design a distinct look, enhance storytelling, or ensure visual consistency across scenes.
Color grading helps you create a mood or coherent sensibility with your color palette. Different from color correction, which makes your images look exactly like they appear in real life, color grading conveys a visual tone. Learn what elements to tweak to achieve a cohesive, artistic, evocative color grade for your images.
How to Color Grade Headshots in Photoshop?
Whether you want a bright tone for your headshots or a darker look, color grading is the essential tool that will help you achieve your desired result. Do you want to use old, outdated headshots? No worries! Using Adobe Photoshop, you can easily apply color grading to your headshots. So, let's dive into the steps:
Step 1. Open Adobe Photoshop on your computer and import your headshot image.
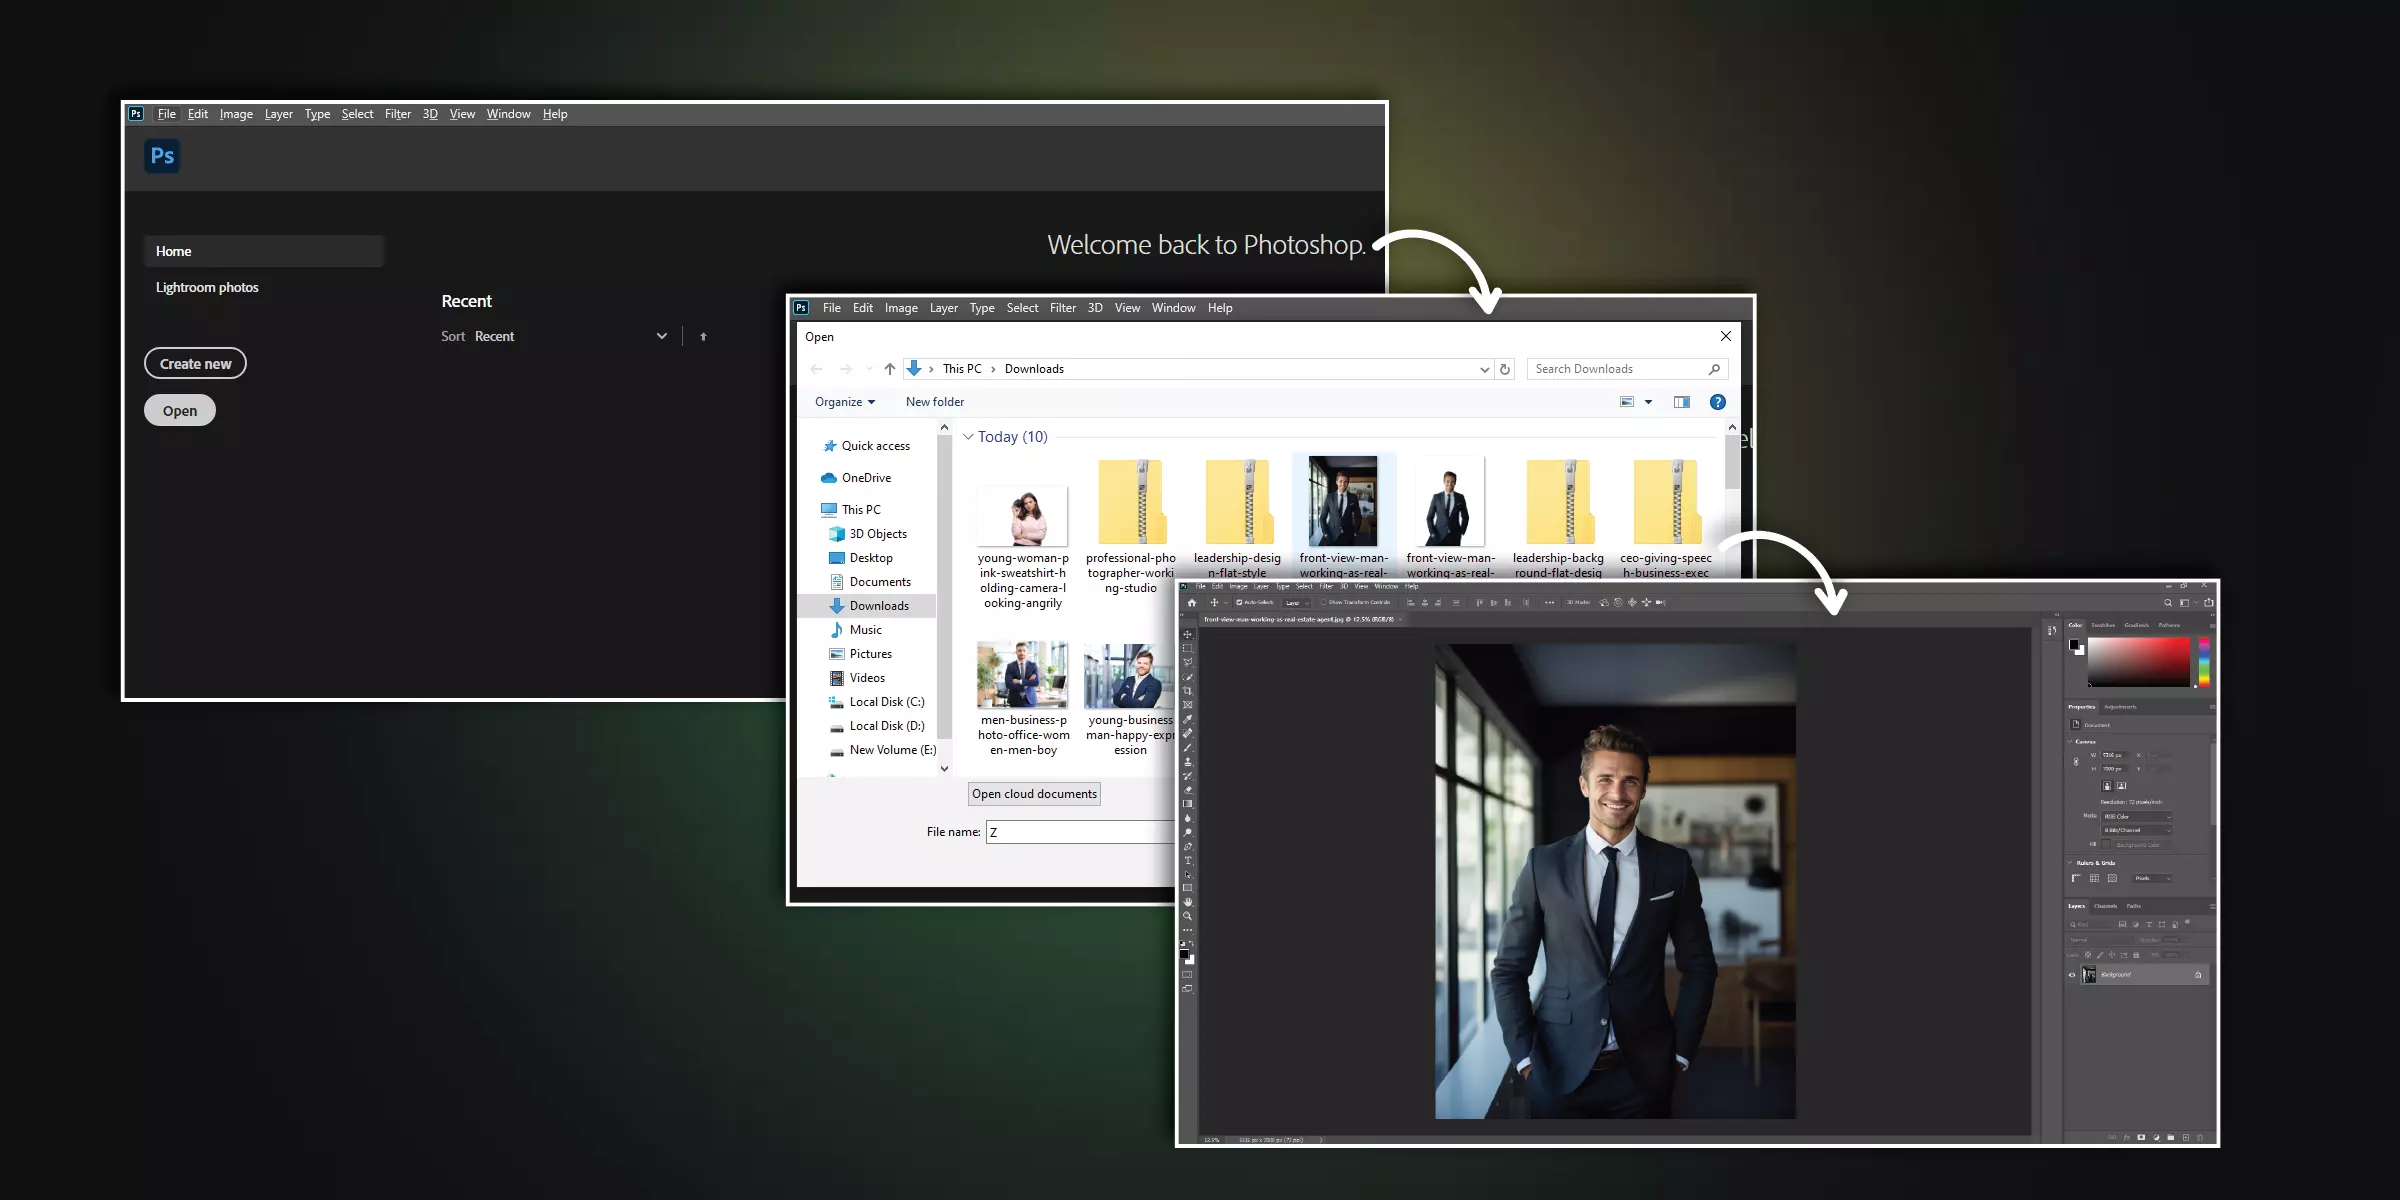
Step 2. Go to the layer option on the toolbar and click “New Adjustment Layer,” and then select “Gradient map” so the box will pop up; click on the “color” and select none option and go down to “mode” and select “soft light” and click on “ok.”
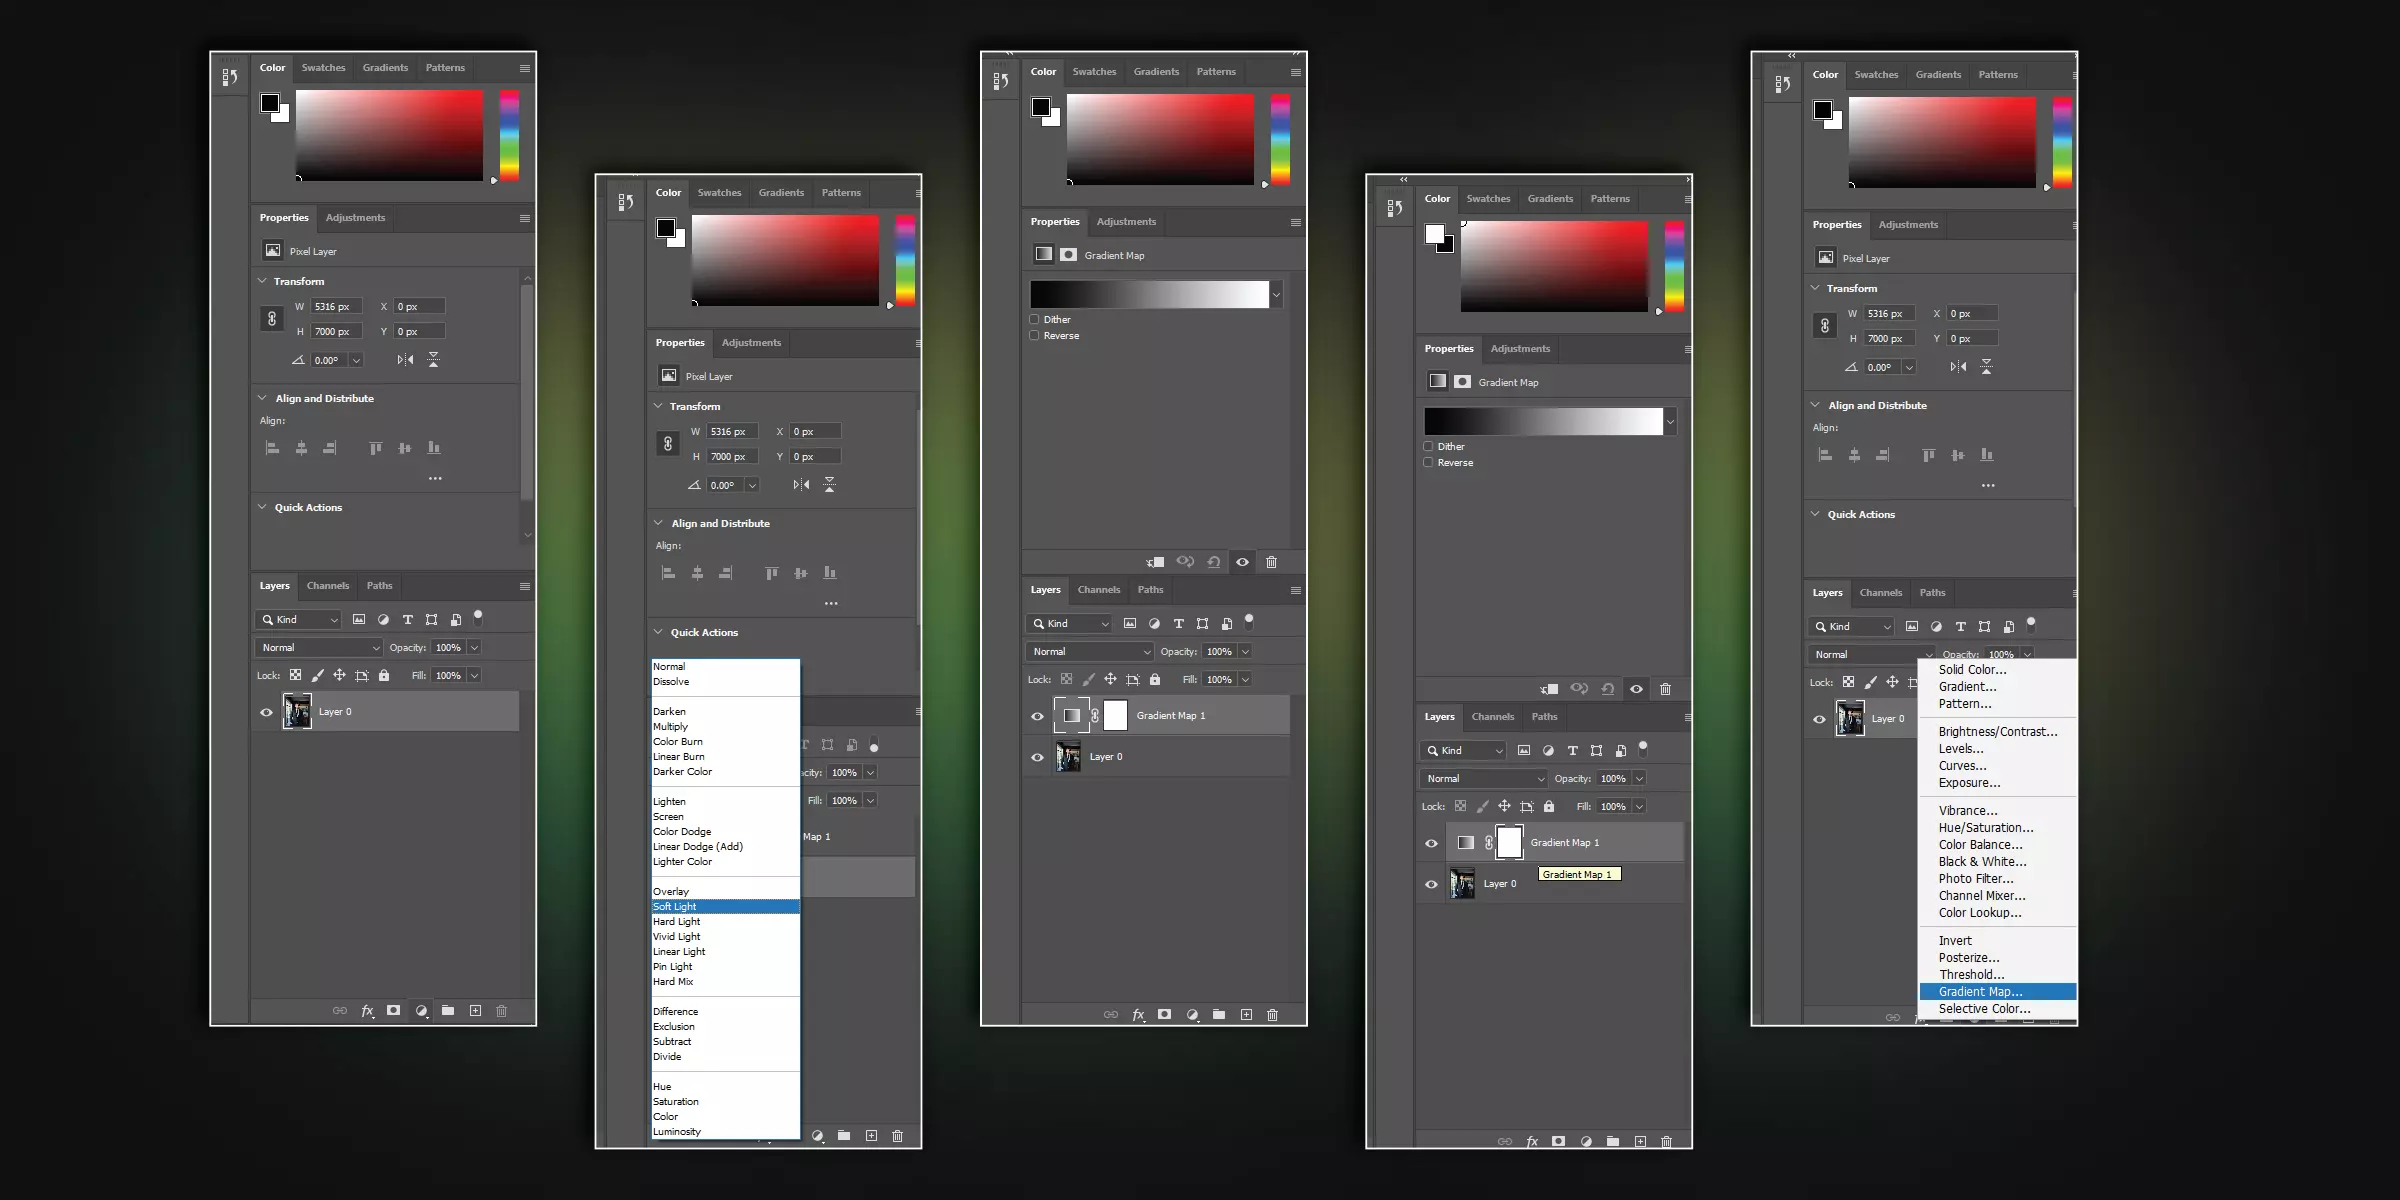
Step 3. From the properties box to the right side of the screen, Click on the “Gradient Map.” a box will appear on the screen. From that box, go to the type option and select “noise.” Below the type, you will see the option “Roughness”; make it to 20%.

Step 4. Below the roughness option, do you see “Randomise”? Keep clicking on it, and you will see the changes in your image. This is called color grading when you keep clicking on Randomise until you like something for your image.
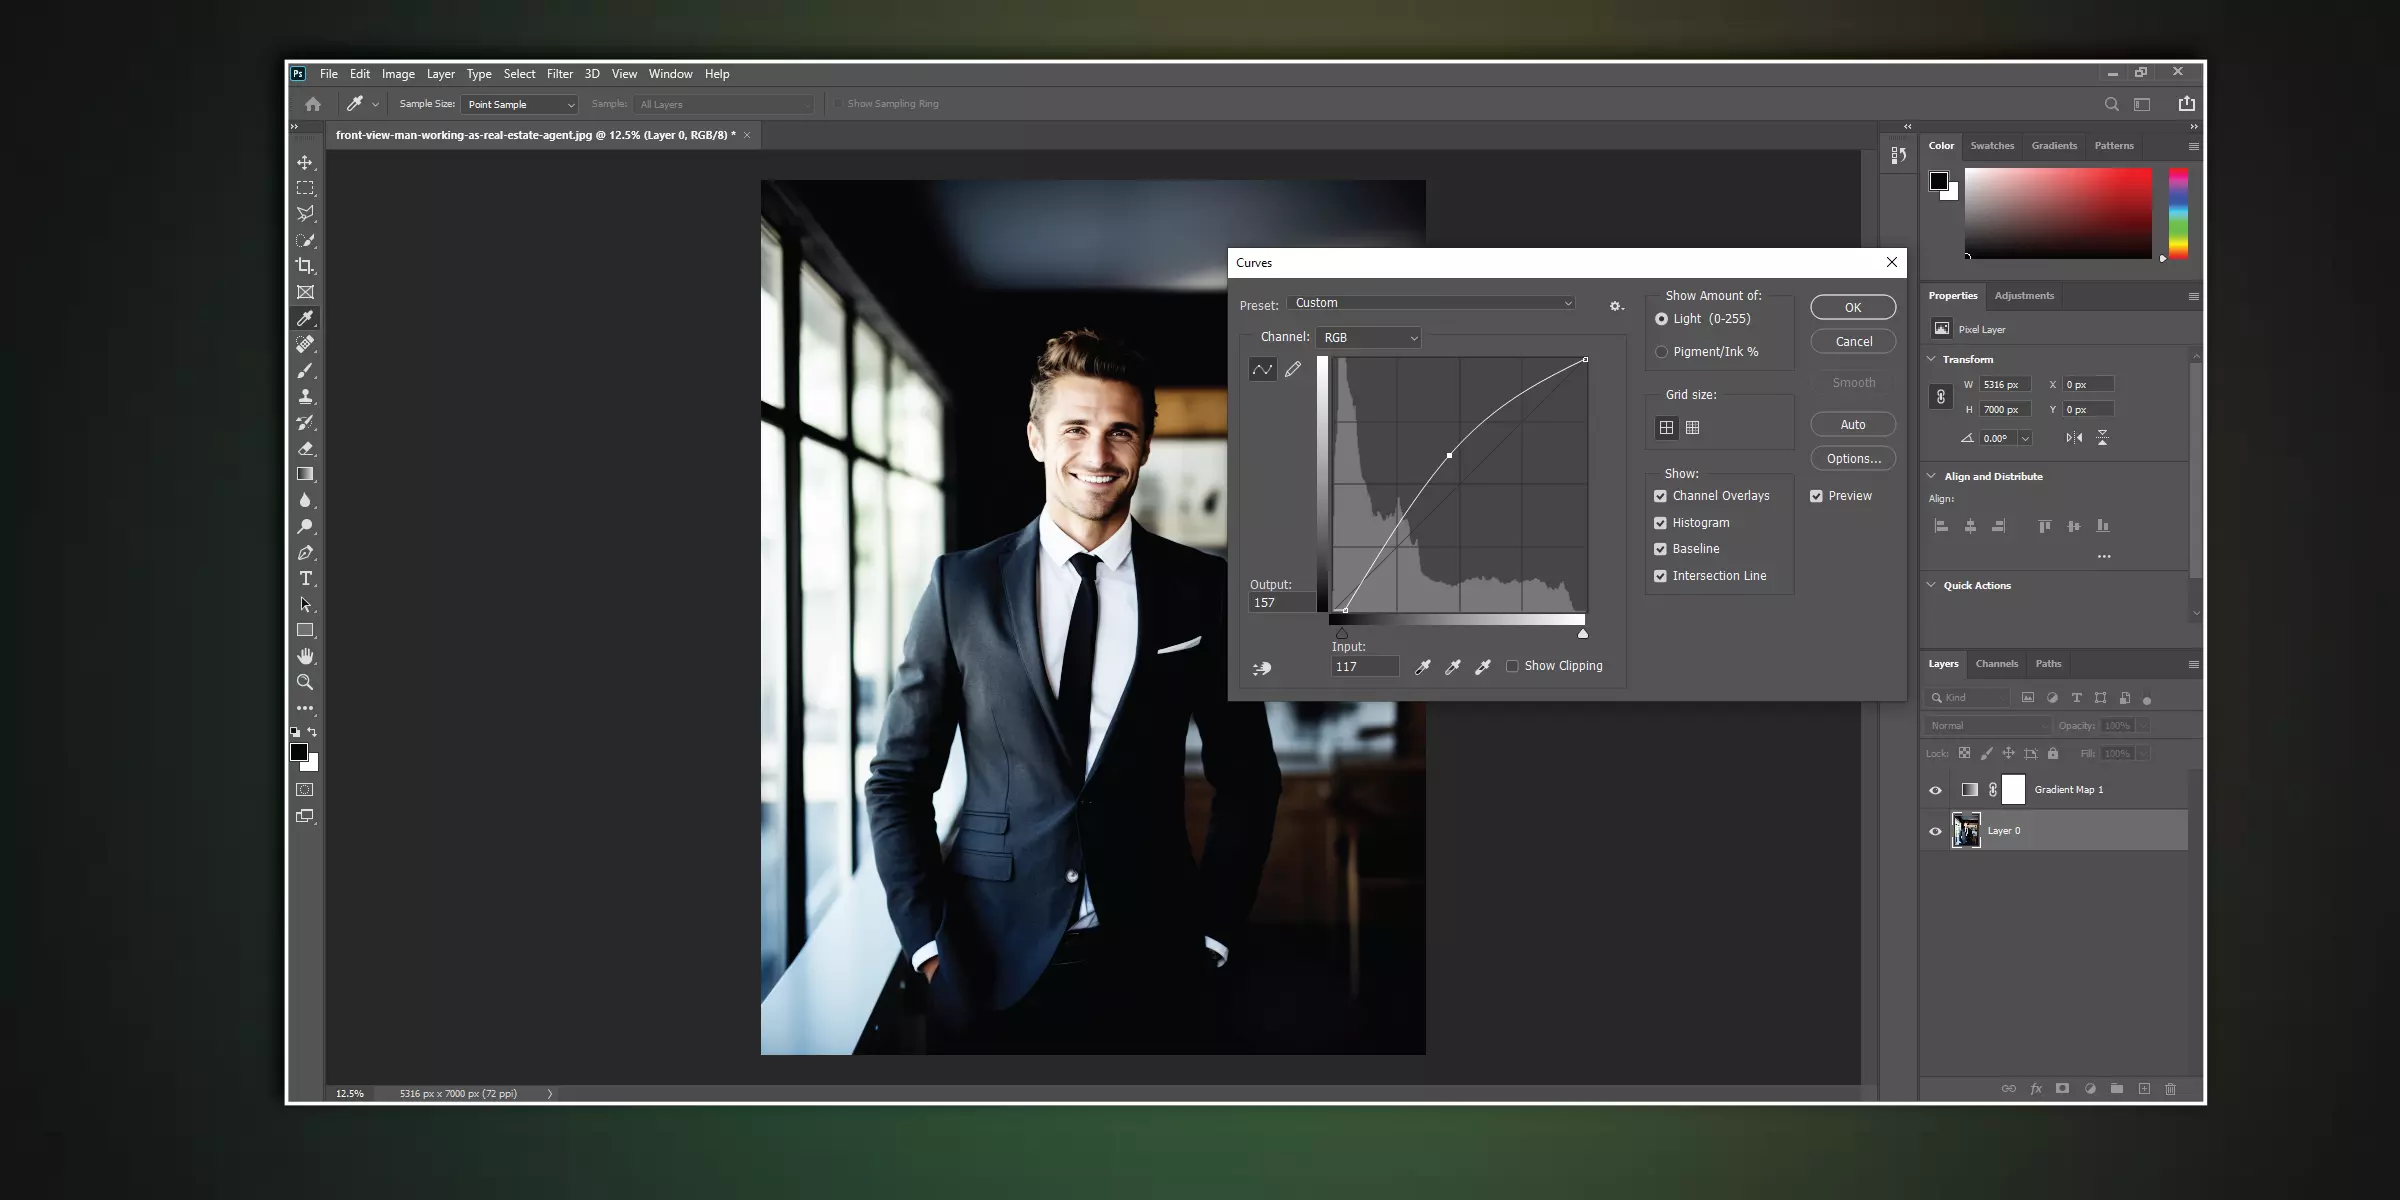
Step 5. If you are satisfied with the color grading, then click on the “Ok” button the the top right of the box.
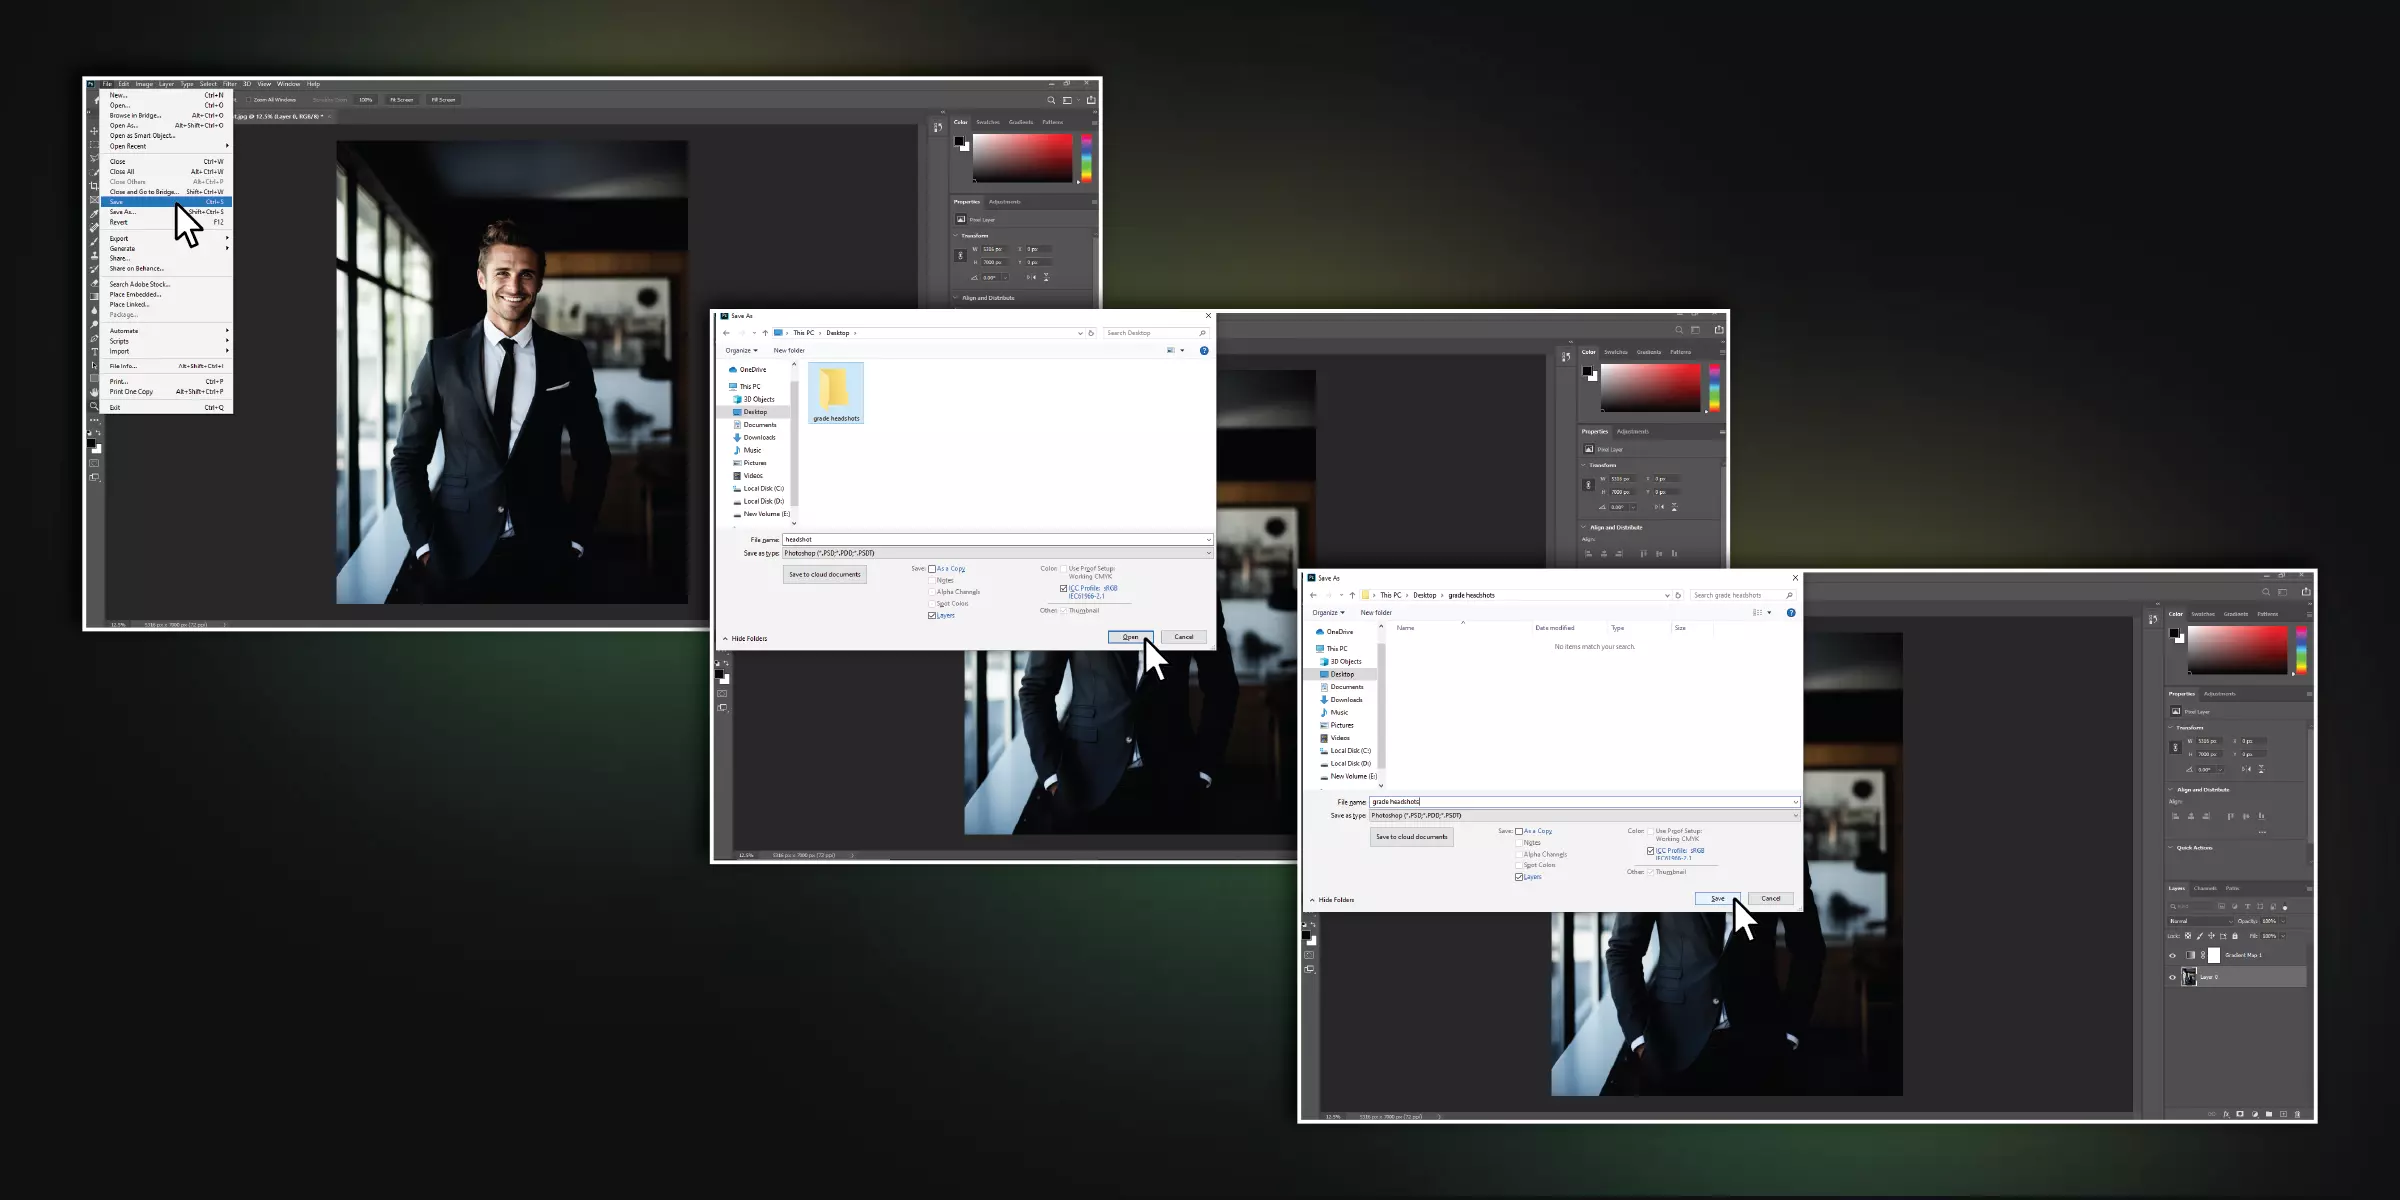
Step 6. If you are satisfied color grading your headshot, you can save your headshot. Go to the File button and click on “Save As.”
So, we are done color-grading the image. You will discover numerous methods for color grading portraits, and experimentation is the key. You can also color-grade your headshot in Lightroom. Do you want to know how? Let's dive into the steps to color-grade headshots in Lightroom.
Steps to Color Grade Headshots in Lightroom
A simple steps to enhance your headshot with the color grading tool; you only need your headshot and Lightroom to create a perfect headshot, so let's begin with the steps :
Step 1. Open Lightroom on your desktop, import the headshot from the “File,” select the headshot from the library panel, and then click on the develop panel from the top right corner of Lightroom.
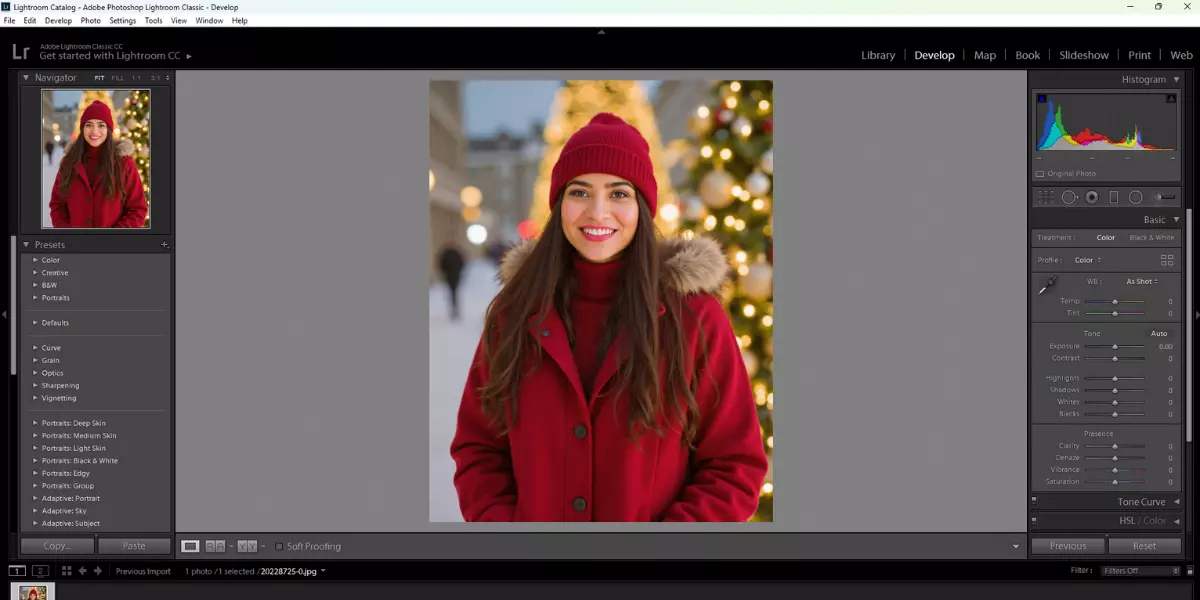
Step 2. After you switch to the Develop panel, a box will appear on the screen with color tools. From that box, you can adjust colors according to your preferences using contrast, exposure, white balance, tint sliders, and the tone curve.
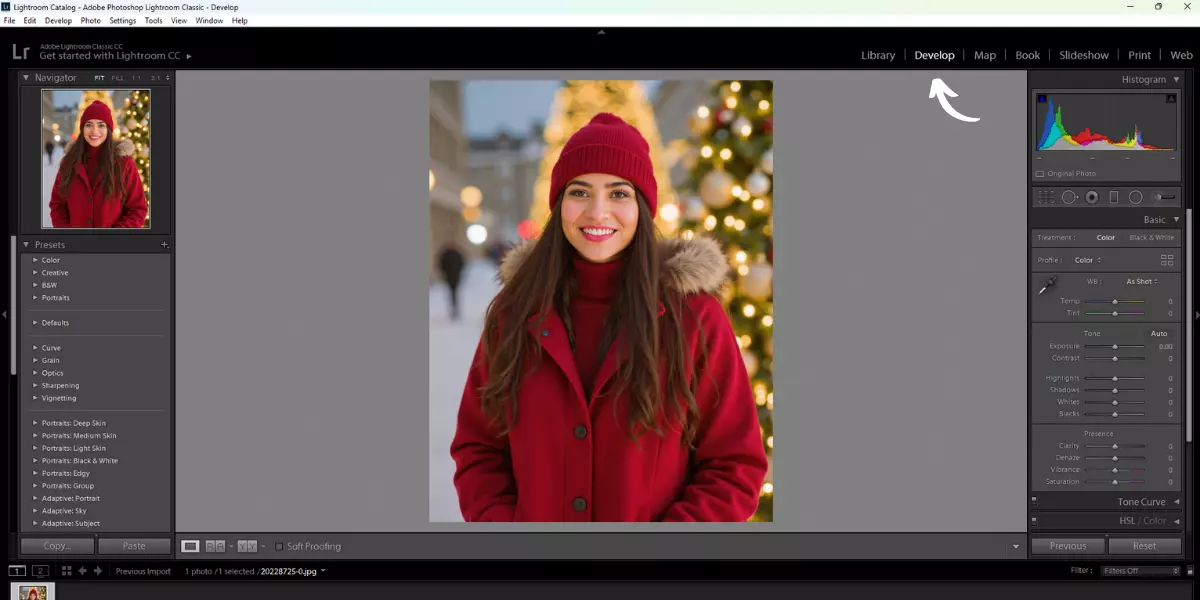
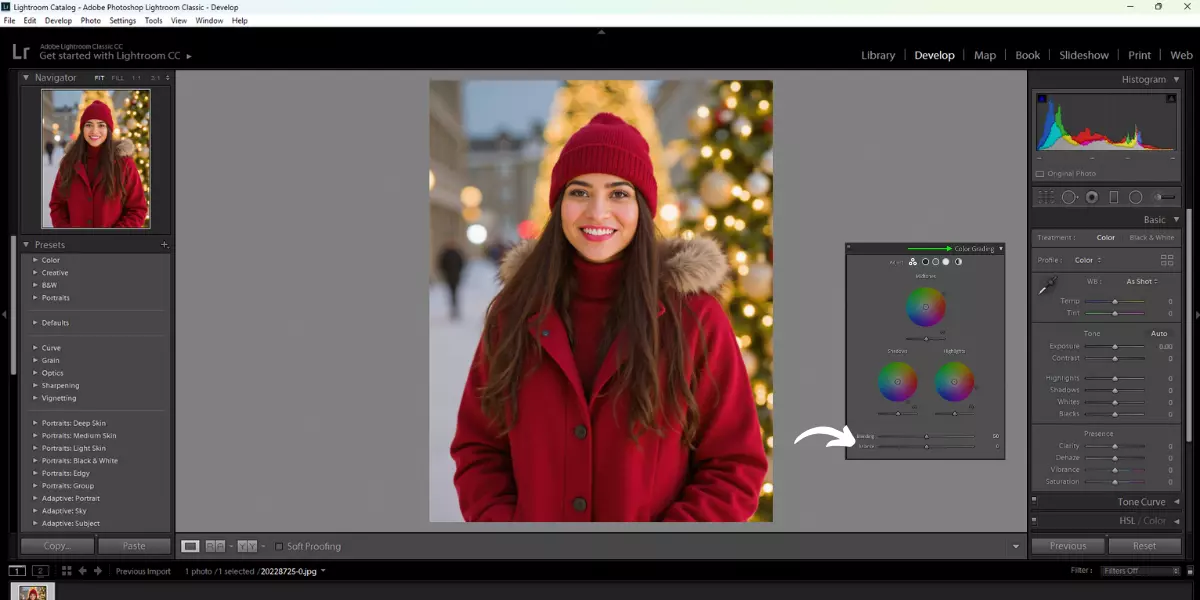
Step 3. Go to the color grading tool from the develop panel, scroll down, and click on the color grading tab.
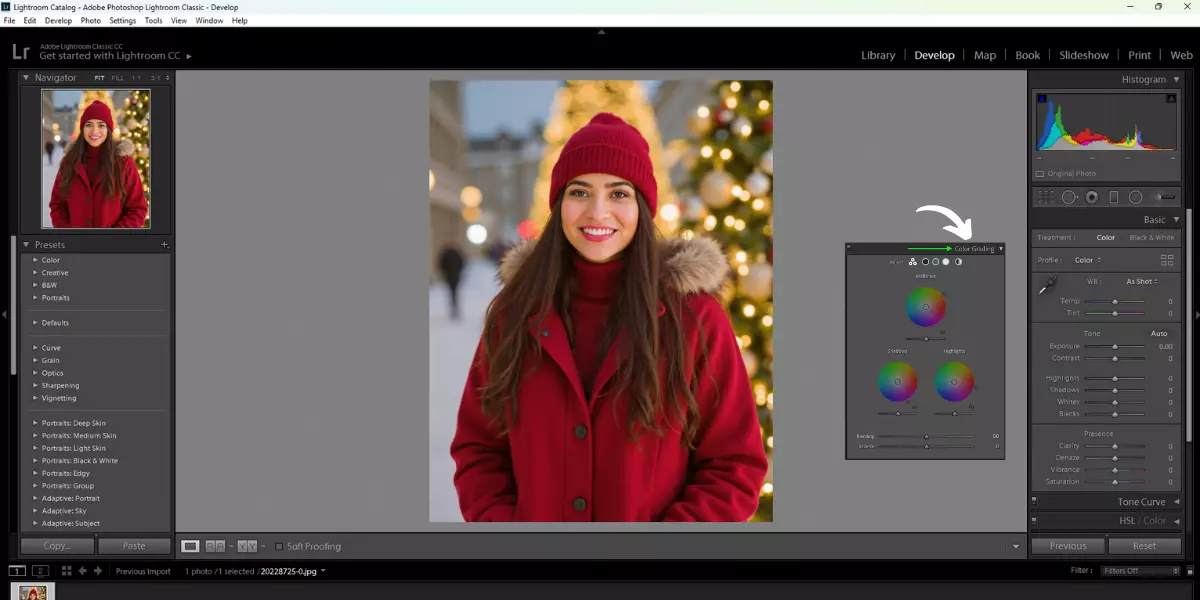
Step 4. You will see three wheels: the midtown, the shadows, and the highlights wheels. Each wheel has a small circle in the center that serves as a handle, which you can drag with your mouse. As you move the handle in circles, the hue (color shade) will change. Moving the handle from the center to the edge will change the saturation, and the slider at the bottom of each color wheel controls the luminance. These controls apply to all color wheels.

Step 5. At the bottom of each color wheel, you'll find Blending and Balance sliders. These sliders are super intuitive and easy to use. Adjust the Balance slider to control the relation between highlights and shadows. Move it left for more shadows and right for highlights.
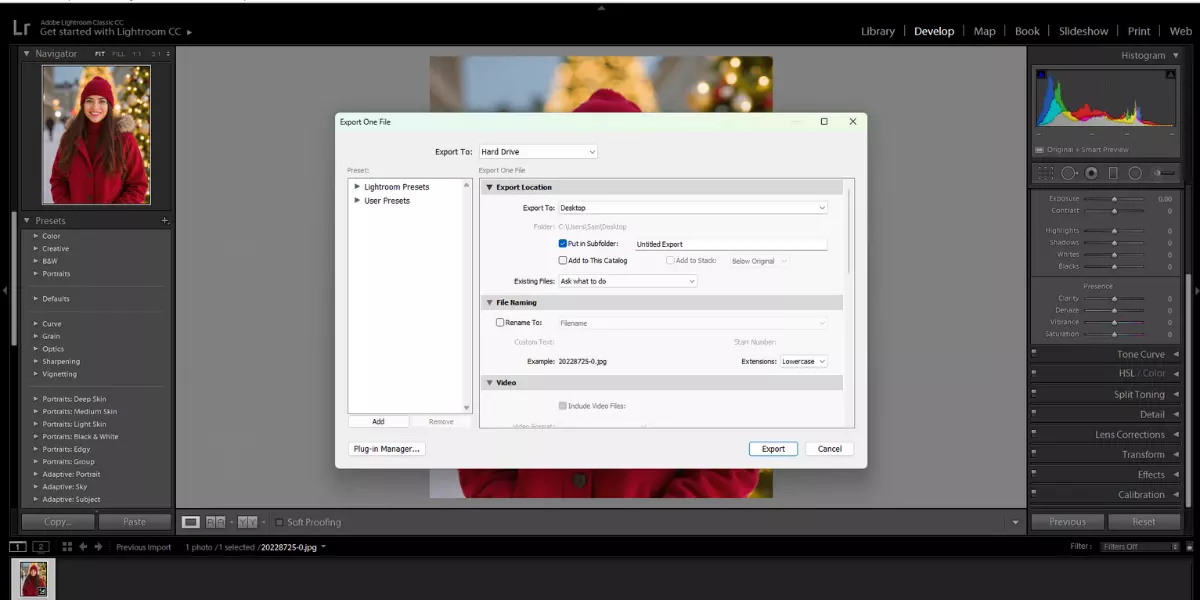
Step 6. Once you are done color grading your headshot, you can export your headshot by using the shortcut key “Ctrl+Shift+E” or go to the File and scroll down until you find the “Export” option.
Benefits of Color Grading Headshots
Using the color grading technique has multiple benefits for your headshots. This method of color grading gives your image a warm tone and a cool tone that can have a great impact on the overall look of your headshot. The benefits you get from color grading are :
1. First impression
Color grading intensifies visual storytelling and controls audience perception by influencing mood, tone, and impression. Different colors bring to mind specific emotions warm tones create feelings of warmth and comfort, while cool tones might evoke calmness or objectivity. Consistent color grading helps establish a cohesive look, making the content feel professional and engaging.
2. Recognition
Choice of Color is crucial as it guides viewers' attention to important elements, highlighting key details and designing a visual hierarchy. Using a specific color palette helps reinforce brand identity, creating awareness and branding. A unified color grade across various media creates a recognizable style that helps audiences instantly identify the source.
3. Give life to headshot
The color grading technique can result in enhancing the appearance of your headshot. Adding color grade to your image improves the quality and makes your headshot stand out from the others. It gives your headshot a bright contrast that completely changes the effect of your headshot and gives a professional look
Conclusion
Color grading headshots is an essential step in achieving a professional and polished look. By adjusting tones, contrast, and hues it helps create a more balanced and visually appealing image that highlights the subject's best features. Whether using Lightroom or Photoshop, mastering these techniques allows for precise control over the final appearance.
The benefits of color grading include enhancing the mood, creating consistency across your portfolio, and ensuring your headshots leave a lasting impression. With the right approach, color grading can significantly elevate your photography game.
FAQ's
Color grading your headshots plays an important role in enhancing the headshot quality and appearance. Color grading in headshots creates consistency across the images and improves the overall aesthetic.
Adobe Lightroom, Adobe Photoshop, and Capture One are some color grading tools. With AIHeasshotGenerator.media, you can achieve the perfect headshot that enhances the appearance and the quality of the headshots with just a few clicks. With this tool, you don't need to color grade your headshots. Why spend hours on editing applications when you can easily transform images into professional headshots with AIHeasshotGenerato.media?
Creating insufficient contrast, oversaturation, and incorrect color temperature are some common mistakes users usually make in color grading. If you are using AIHeadshotGenerator.media, you don't have to worry about manual edits and mistakes. This tool automatically transforms your ordinary image into a professional headshot, enhancing the overall appearance of your headshot.
Color grading tips from experts are designed to help you achieve a perfect balance of warmth and coolness, enhance natural colors, use precise local adjustments, and avoid over-processing. It's all about bringing out the best!


